 New Year Sale
  Kick Off 2026 With a Whopping 25% OFF! Use Code:
 OpenAI
 Perplexity
Introduction
Success in the fast-paced world of e-commerce depends on remaining one step ahead of the curve. One way to do this is by integrating cutting-edge payment solutions like Finix with your WooCommerce store.
In this article, we’ll walk you through the process of setting up Finix for WooCommerce today. By the end of this guide, you’ll have a seamless payment system that enhances user experience and streamlines your online business.
Why Choose Finix for WooCommerce?
Before diving into the setup process, let’s briefly discuss why you should consider Finix for your WooCommerce store over other payment gateways for WooCommerce:
- Customization: Finix offers a high level of customization, allowing you to create a unique payment experience tailored to your brand which customers can relate with.
- Reduced Costs: By using Finix, you can potentially lower payment processing costs compared to traditional gateways which allows you to give your customers a better deal than competitors in the market.
- Scalability: Finix is designed to grow with your business, making it a suitable choice for businesses of all sizes. It enables you to setup shop internationally and increase your sales scope, thus increasing revenue for your business.
- Modern Technology: Finix leverages the latest technologies and security measures to ensure safe and efficient payment processing. Key issues like safety of your payment system as well as for your customers is guaranteed.
Let’s begin Setting Up Finix for WooCommerce the right away:
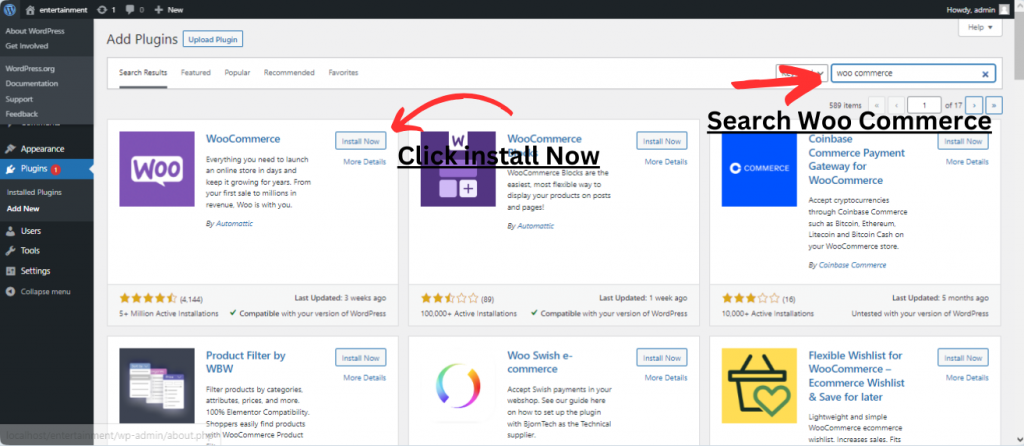
Step 1: Install WooCommerce on Your WordPress Website
- Access your WordPress administrative dashboard.
- Go to the “Plugins” area and select “Add New.”Search for “WooCommerce” and click “Install Now.”
- After installation, click “Activate” to enable WooCommerce on your website.
- Follow the setup wizard to configure your store settings, including currency, payment methods, and shipping options.
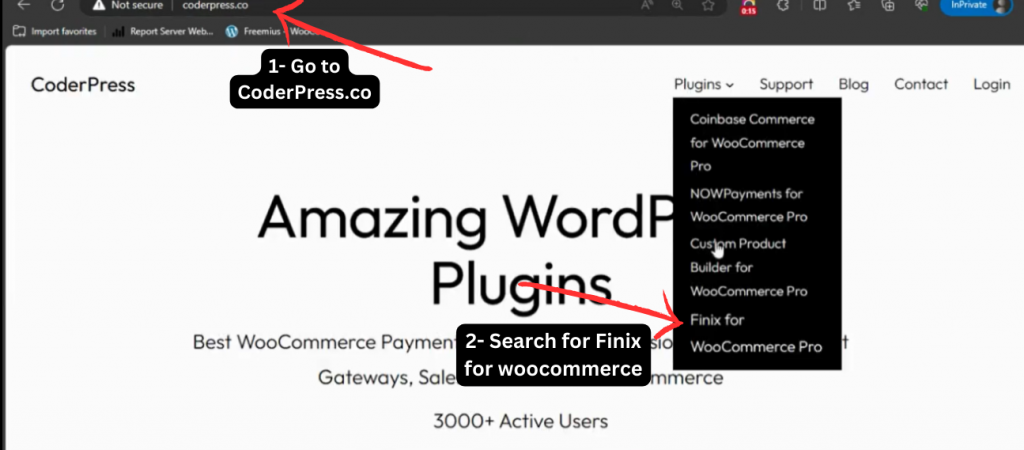
Step 2: Activate Finix plugin from CoderPress.co
- In a new tab open CoderPress.co website.
- Go to plugins section search for Finix for woocommerce pro.
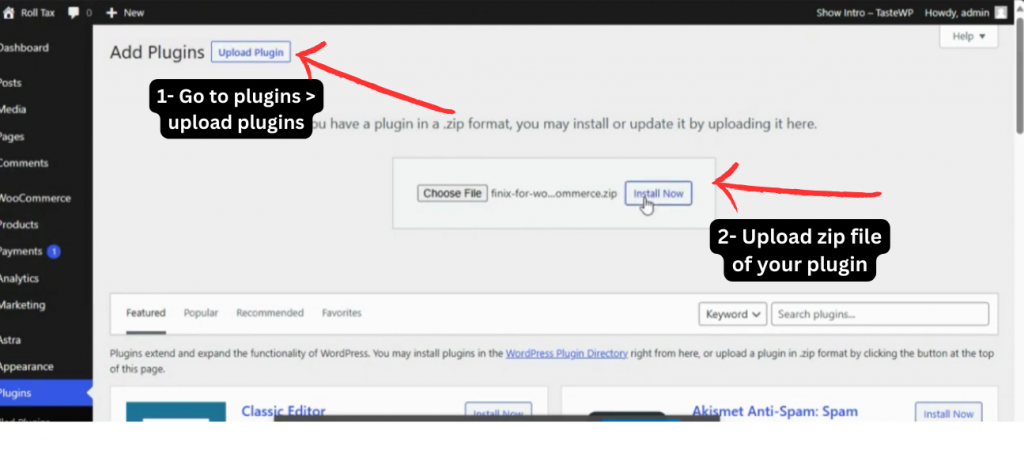
3. Buy starter package then go to your wordpress dashboard, go to the “Plugins” area and select “Add New.
4. Upload the zip file that is the plugin you buy from Coderpress.co. Enter the licence key to activate it.
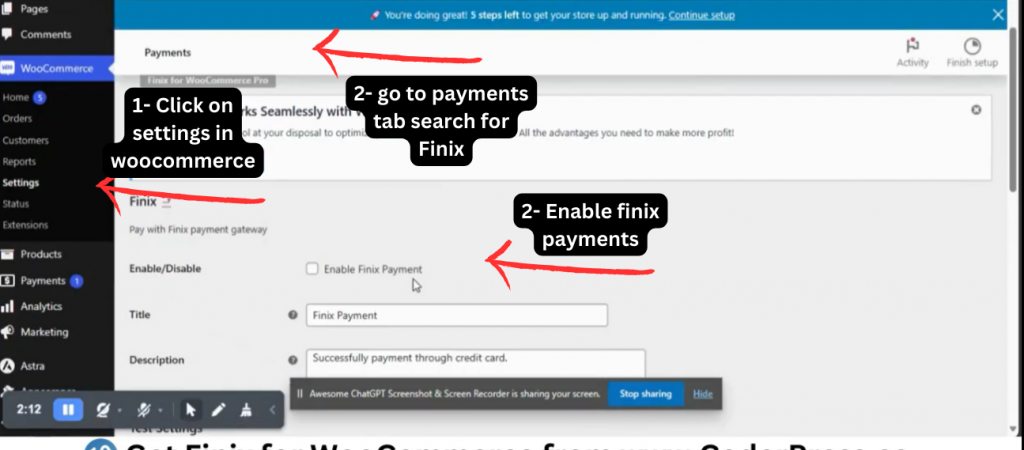
Step 3: Configure the Finix Plugin
Select WooCommerce > Settings from the WordPress dashboard.
- Click on the “Payments” tab.
- You should see “Finix” listed as an available payment method. Click on it to configure the settings.
- Tick mark on Enable Finix Payment.
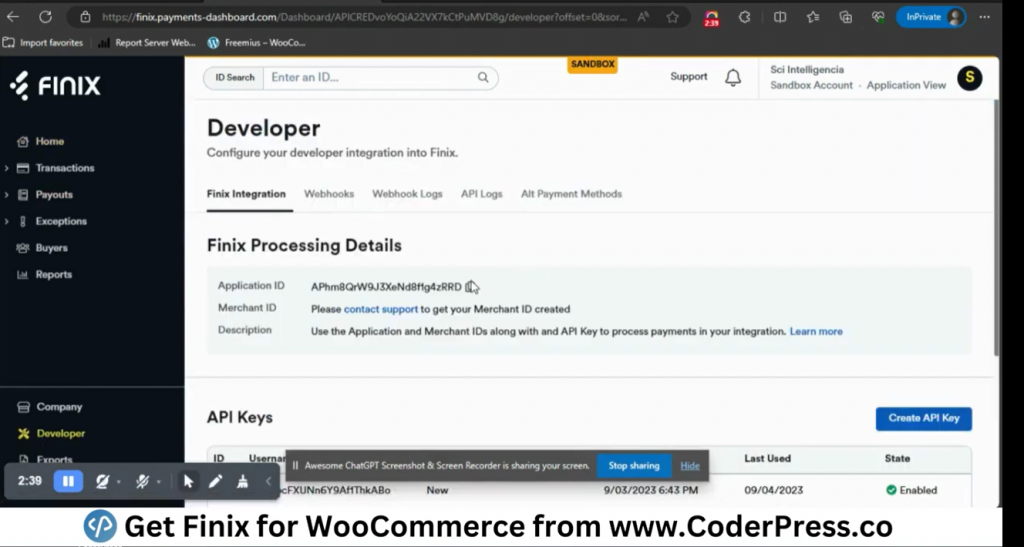
4. Enter your Finix API credentials, which you can find in your Finix dashboard.
5. Customize the payment options, including title, description, and order status.
6. Save your settings.
Step 4: Test Your Setting Up Finix for WooCommerce
Before going live, it’s crucial to test your payment integration thoroughly.
- In WooCommerce settings, enable “Test Mode” to simulate transactions without real money.
- Place a test order using a test credit card provided by Finix.
- Ensure that the payment process works smoothly, and the order status updates correctly.
Step 5: Go Live
Once you’ve successfully tested your setup and are confident in its functionality, it’s time to switch off “Test Mode” in WooCommerce settings and start accepting real payments.
Conclusion
Setting up Finix for WooCommerce can greatly enhance your online store’s payment processing capabilities. With its flexibility, scalability, and customization options, Finix empowers businesses to take control of their payment processes and offer a seamless shopping experience to customers.
By following the steps outlined in this guide, you’ll be well on your way to integrating Finix with your WooCommerce store and reaping the benefits of improved payment processing. Stay updated with the latest Finix features and best practices to continue maximizing your e-commerce success in the ever-evolving digital landscape.

Leave a Reply