 New Year Sale
  Kick Off 2026 With a Whopping 25% OFF! Use Code:
 OpenAI
 Perplexity
In the world of e-commerce, providing customers with the ability to customize their products can be a game-changer. It not only enhances the shopping experience but also increases conversion rates and customer satisfaction. If you’re running your online store on WooCommerce, setting up a custom product builder can help you achieve these goals. In this blog post, we’ll walk you through the process of creating a custom product builder for your WooCommerce store.
Why You Need a Custom Product Builder
Before we dive into the technical details, let’s understand why having a custom product builder is crucial for your WooCommerce store;
- Personalization: Customers love products that reflect their individual preferences. A custom product builder allows them to choose colors, sizes, materials, and other options, making the product uniquely theirs.
- Increased Sales: Customized products often come at a premium price. Offering customization can boost your average order value and increase your revenue.
- Reduced Returns: When customers have a hand in designing their products, they are less likely to be dissatisfied with the end result, leading to fewer returns and refunds.
You can learn many more benefits of Custom Product Builder for WooCommerce for your store
Let’s now delve into the specifics of configuring your custom product builder.
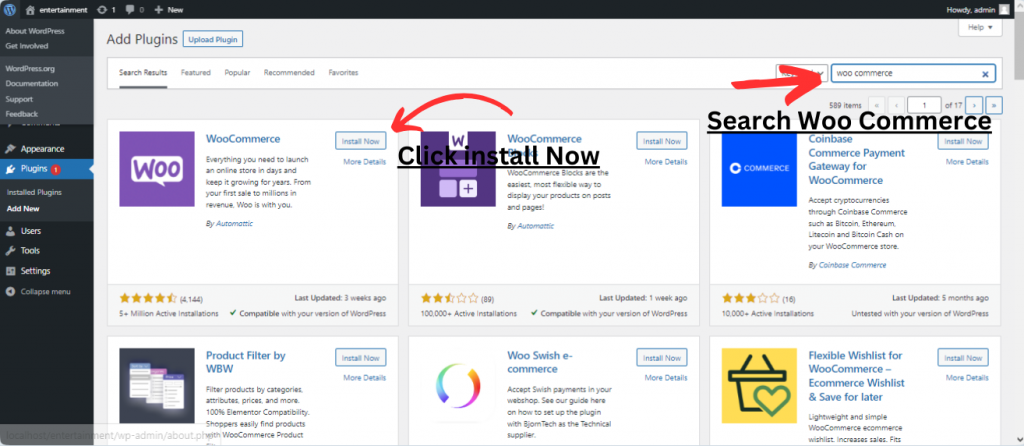
Step 1: Install WooCommerce
If you haven’t already, you need to install WooCommerce on your WordPress site. WooCommerce is a robust e-commerce plugin that powers millions of online stores. You can find it in the WordPress plugin repository and install it with just a few clicks.
Step 2: Choose Custom Product Builder for WooCommerce from Coderpress:
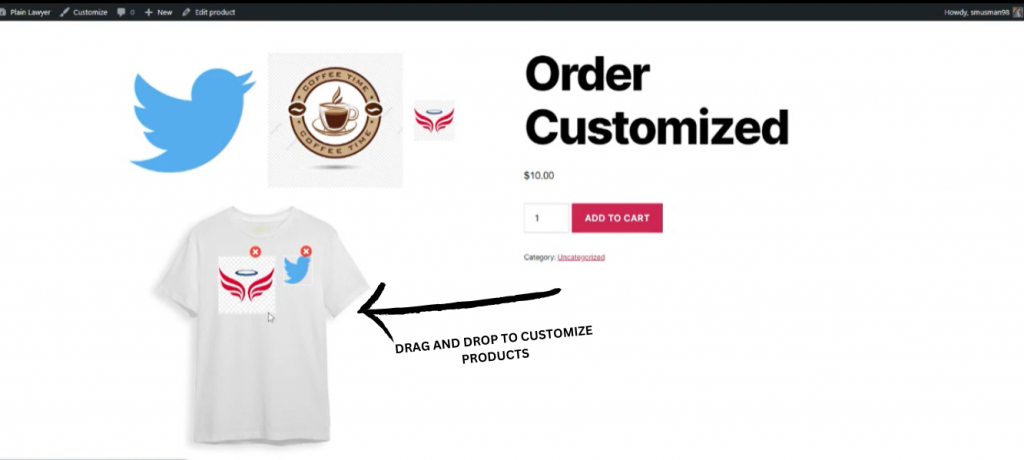
It’s a highly customizable product designer tool that integrates seamlessly with WooCommerce. It allows customers to design and order customized products using drag and drop, add custom text, add images, resize images etc.
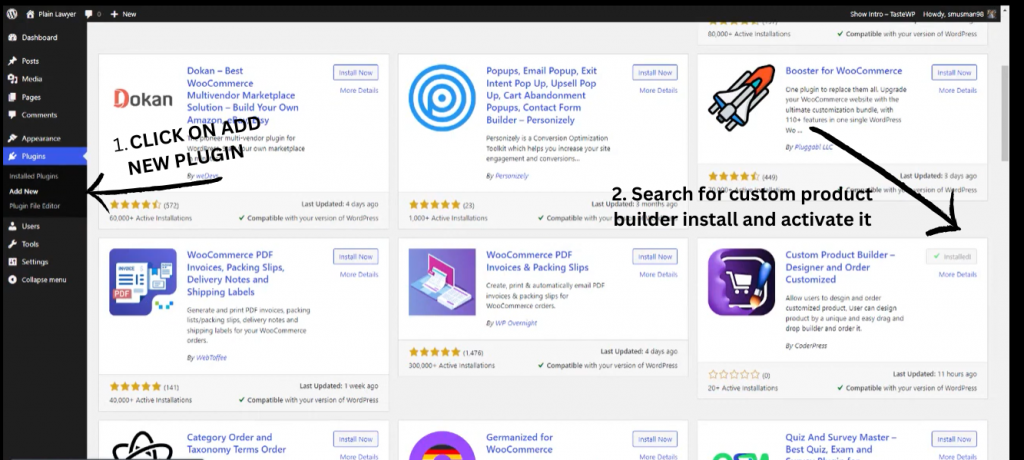
Step 3: Install and Configure the Plugin
Install and activate Custom Product Builder on your WordPress site.
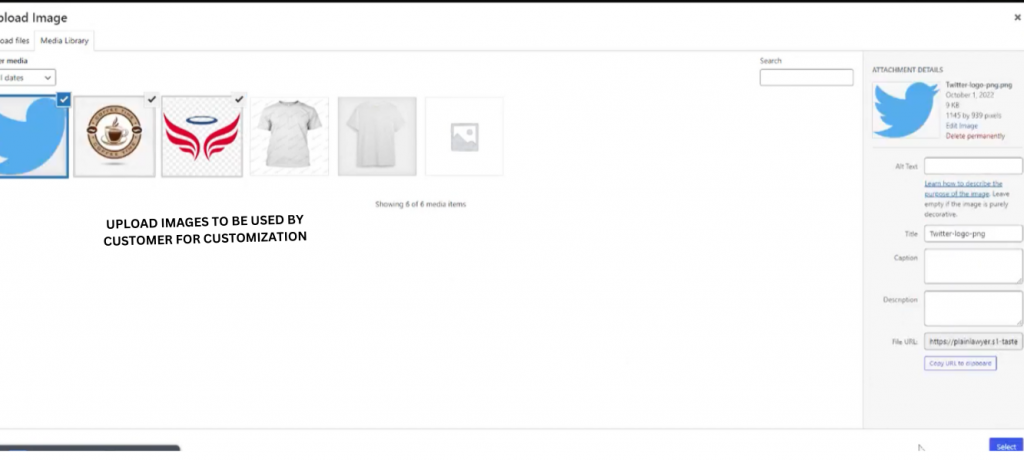
- Create Product Options: Define the various product options your customers can customize, such as colors, sizes, materials, and more.
- Set Pricing Rules: Configure how the price of the final product is calculated based on the chosen options. You can set fixed prices, variable prices, or use custom formulas.
- Design the User Interface: Customize the look and feel of the product builder to match your brand and make it user-friendly.
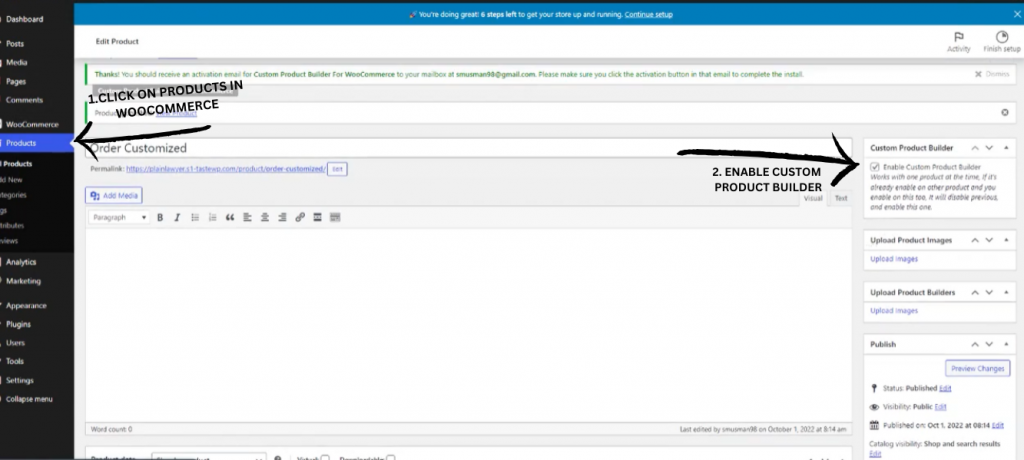
Step 4: Publish Customizable Products
Now that your custom product builder is set up, it’s time to create products that customers can customize. Go to your WooCommerce Pro dashboard and add new products or edit existing ones, enabling the custom product builder for those products.
Step 5: Promote Your Customizable Products
To make the most of your custom product builder, promote your customizable products through your website, email marketing campaigns, and social media. Highlight the benefits of personalized products and how easy it is to use your builder.
Conclusion
Setting up a custom product builder for WooCommerce Pro can significantly enhance your online store’s capabilities and customer experience. By offering personalized products, you can increase sales, gain a competitive edge, and provide a unique shopping experience for your customers. Choose the right plugin, configure it to suit your needs, and watch your e-commerce business thrive. With the right strategy and tools, you’ll be well on your way to success in the world of online retail.

Leave a Reply